TABLE OF CONTENTS
1. Table Settings
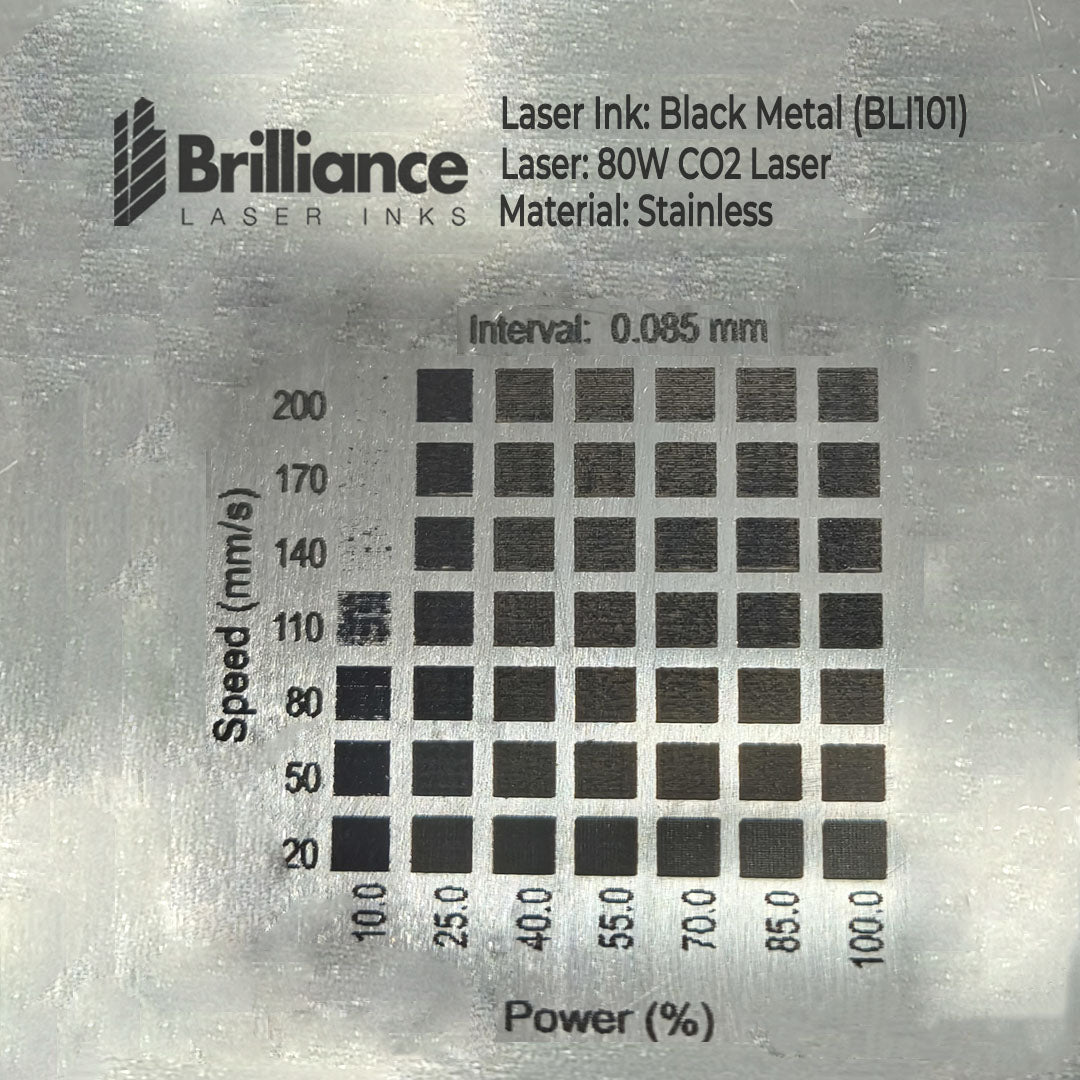
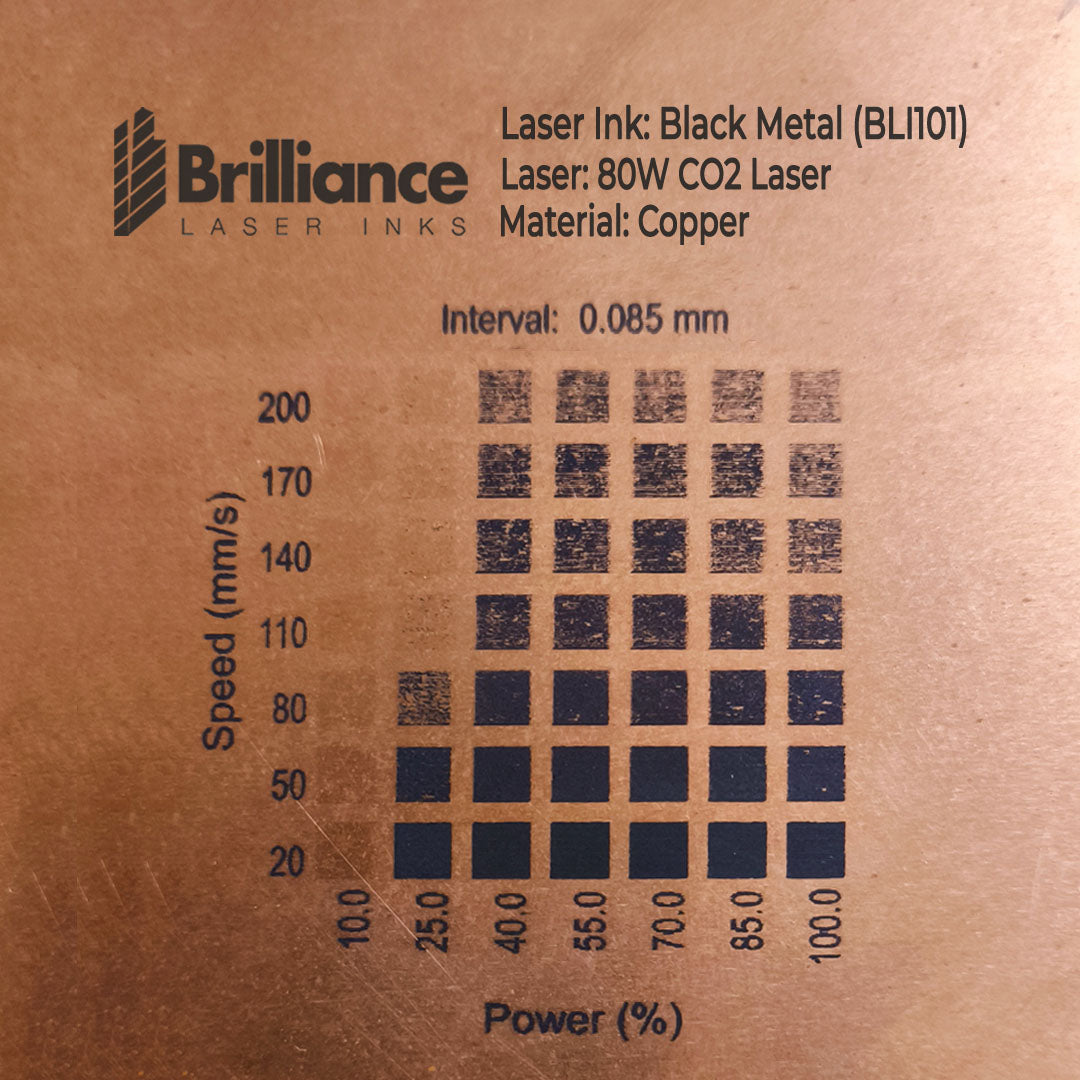
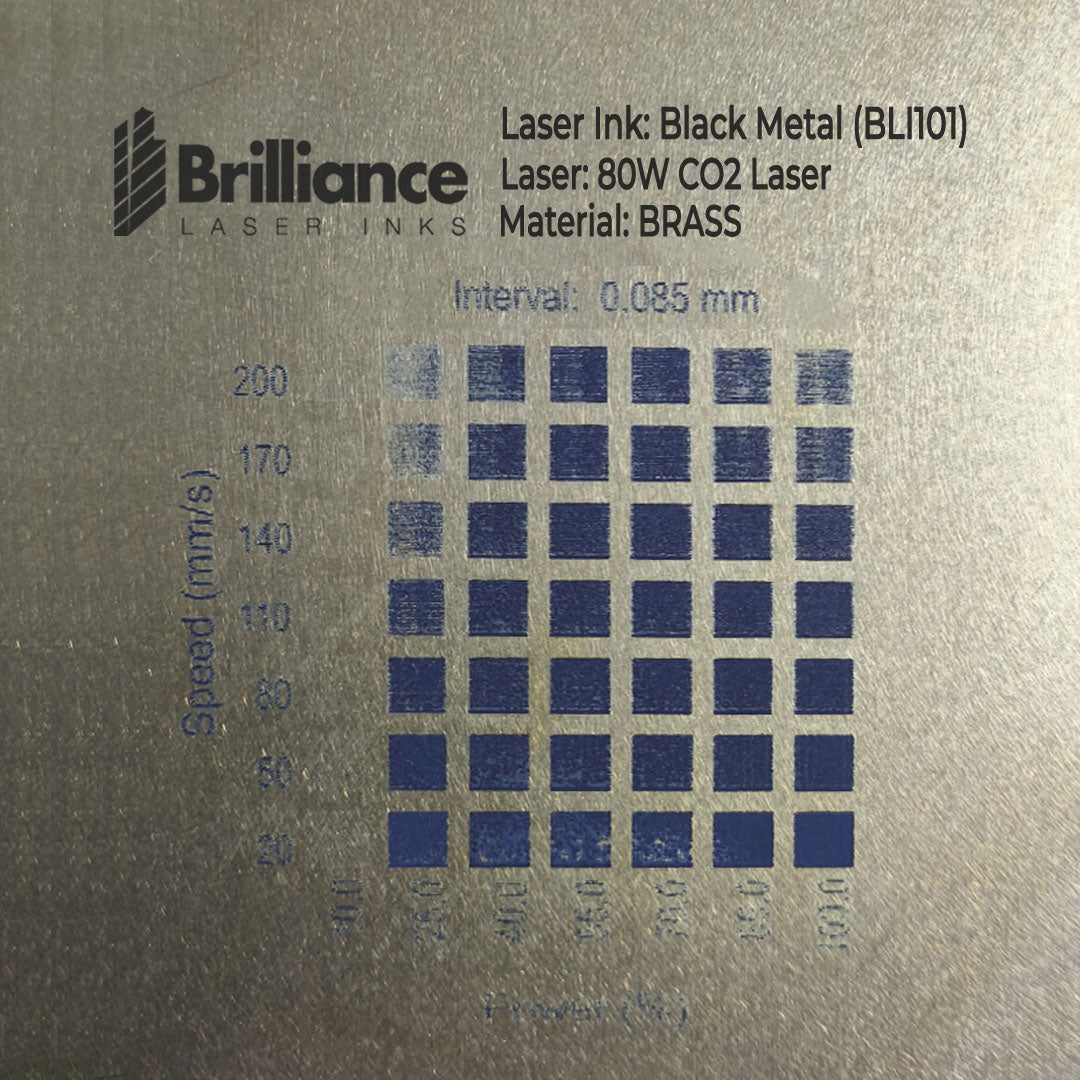
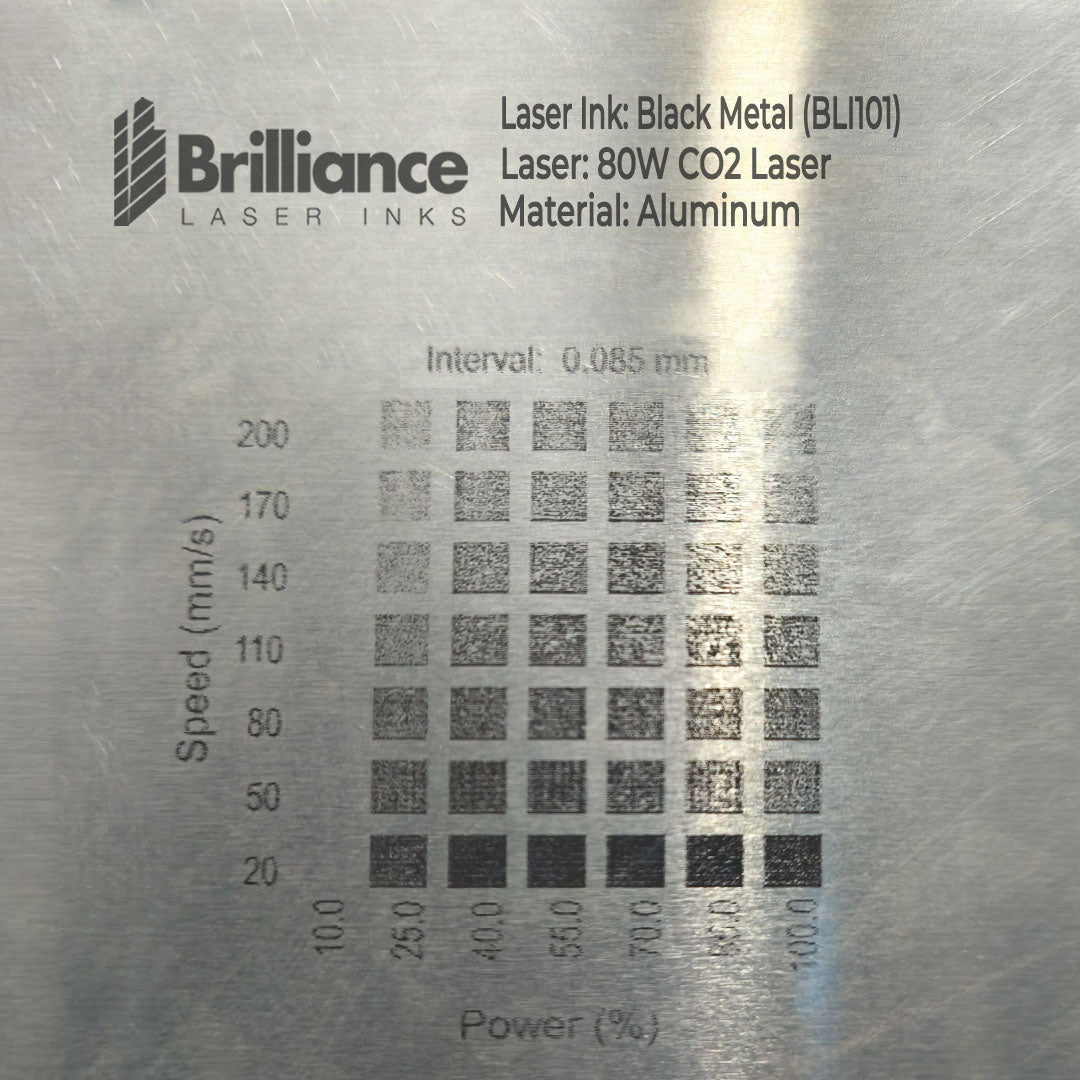
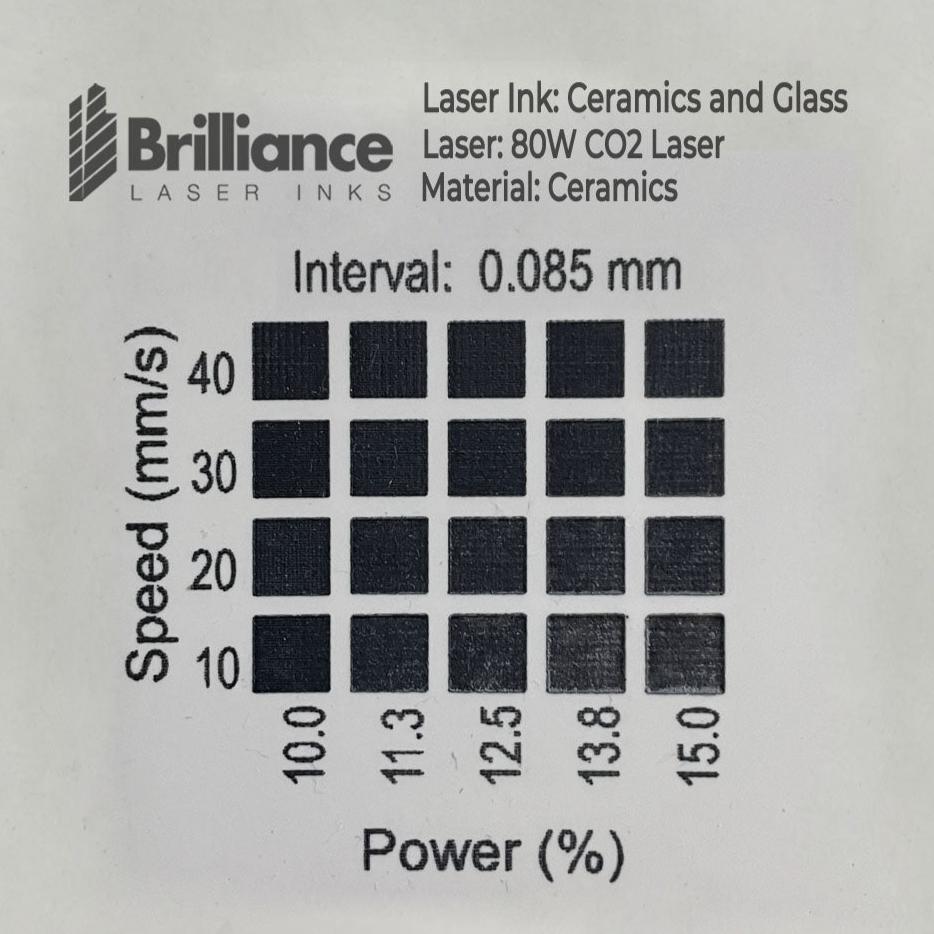
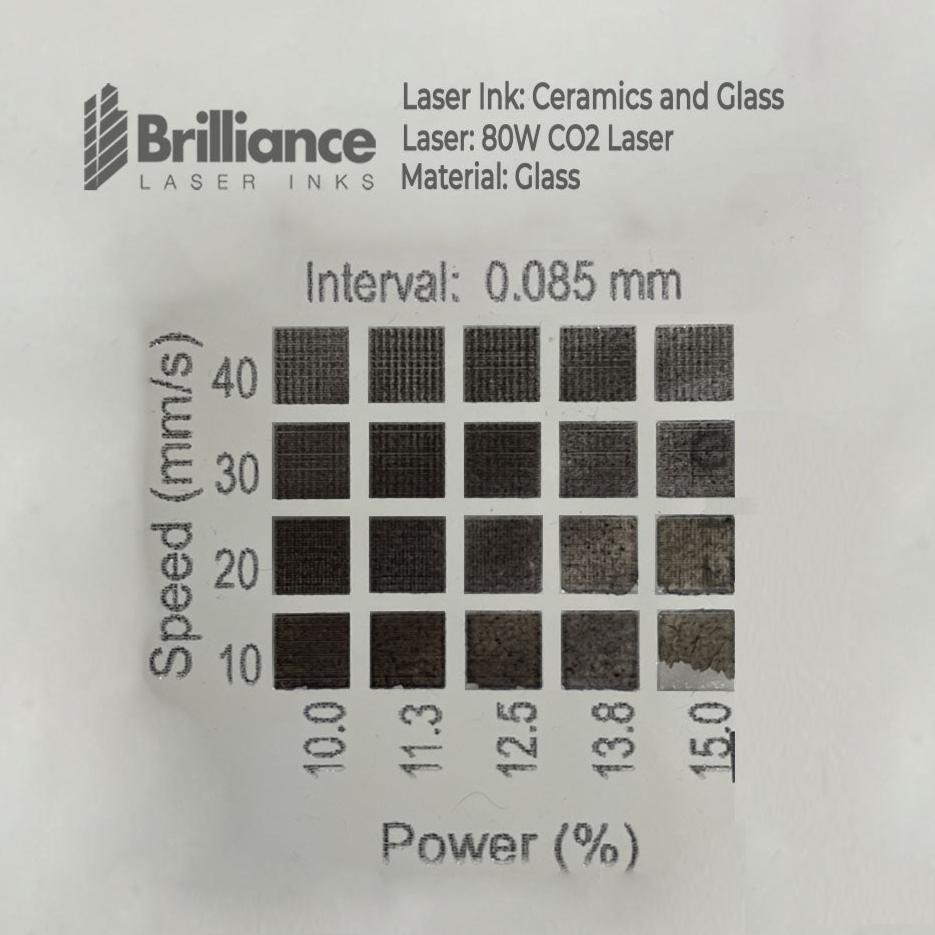
2. How to read material test
3. Grid Settings
4. Quick Guides
5. Disclaimer
5.1 Safety Precautions
5.2 Best Practices
5.3 Operational Guidelines
5.4 Resources and Key Points
6. FAQ's
CO2 Table Settings
|
CO2 Laser Black Metal Marking Spray |
||||
|
Power (60W) |
Speed (2m/sec.) or percentage |
Speed (mm/s) |
DPI |
|
|
Stainless Steel |
50 % |
100 |
300 |
|
|
Copper |
100 % |
50 |
300 |
|
|
Brass |
100 % |
50 |
300 |
|
|
Aluminum |
100 % |
40 |
300 |
|
|
CO2 Laser (60W, 2m/sec) Ceramics and Glass Black Marking Spray |
||||
|
Power (60W) |
Speed (2m/sec.) or Percentage |
Speed (mm/s) |
PPI |
|
|
Ceramics |
10 % |
10% |
500 |
|
|
Glass |
10 % |
60% |
500 |
|
Note: These are just general guidelines, and settings may vary,
depending on the laser you are using and the substrate you have for marking.
The above test was performed on:
Creality Diode laser
Max Wattage: 40 watts
Speed unit in mm/m ( Millimeters per Minutes)
The above test table settings were generated by using a 40W
Diode Laser, please make sure these specifications match with your
laser otherwise, check your laser specifications and make sure the
resultant wattage at 10% as noted in the above table for Ceramics
matches your final settings to get the same result.
For Example:
10% of 40 watt = 4 watt
20% of 20 watt = 4 watt
Storage: Keep all Brilliance Laser Inks products stored in a clean, dry,
and dark environment, maintaining a room temperature for optimal
preservation

Grid Settings
-
Card heading
Pair text with an image to focus on your chosen product, collection, or blog post. Add details on availability, style, or even provide a review.
-
Card heading
Pair text with an image to focus on your chosen product, collection, or blog post. Add details on availability, style, or even provide a review.
-
Card heading
Pair text with an image to focus on your chosen product, collection, or blog post. Add details on availability, style, or even provide a review.
-
Card heading
Pair text with an image to focus on your chosen product, collection, or blog post. Add details on availability, style, or even provide a review.
-
Card heading
Pair text with an image to focus on your chosen product, collection, or blog post. Add details on availability, style, or even provide a review.
-
Card heading
Pair text with an image to focus on your chosen product, collection, or blog post. Add details on availability, style, or even provide a review.


Quick Guide
-

1. Clean the Surface
- Start by cleaning the material surface with alcohol to remove any dirt or oils.
- Make sure the surface is completely dry before proceeding.
-

2. Apply the Spray
- Shake the bottle well before using to ensure all the contents are properly mixed.
- Hold the bottle at a 45° angle, about 6-8 inches away from the surface.
- Use a left-to-right motion to apply an even, thin coat. Apply just enough until the surface is no longer see-through.
-

3. Laser Settings
- Adjust your laser settings based on the material you’re working with.
- Please click here for general recommended settings.
- Adjust your laser settings based on the material you’re working with.
-

4. Removing the residue
- There’s no waiting time required! Once you're done lasering, rinse the surface under tap water or simply wipe it with a wet cloth. That’s it—enjoy your permanent, high-quality mark on your finished product!